For any startup thinking about developing a prototype, architecting and building from scratch can be exhausting. A myriad of questions come up like — what framework, database, or ORM should we use? How do we structure our code? What naming conventions should we use? How do we write code that can accommodate comprehensive testing? How should we do integration testing?
This freely available project can help you answer a number of these questions. The concepts and methods used have been tested and validated in successful startups and industrial projects I have worked on.
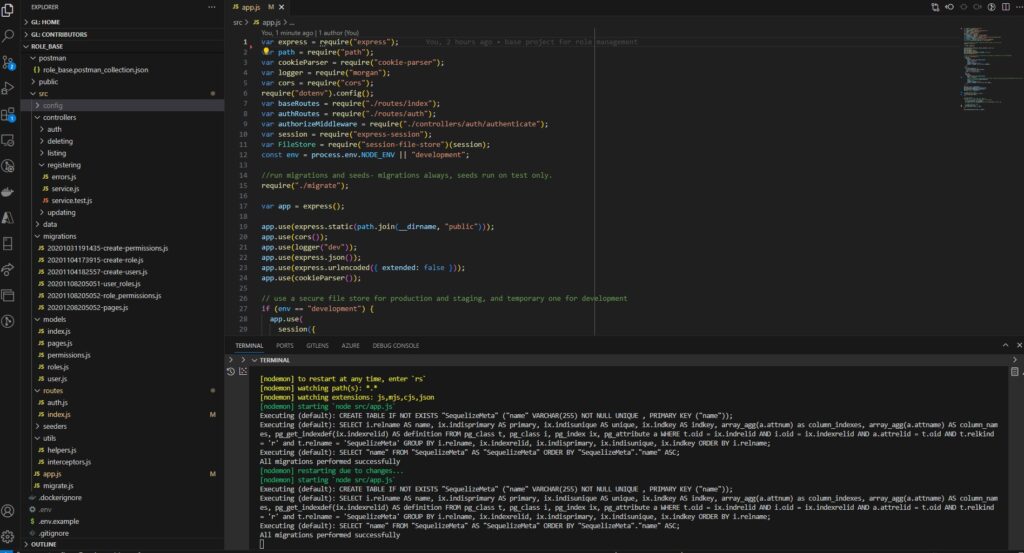
The philosophy of this base project is to separate the code into three core folders: controllers which have the main logic, models folder which has all the database schemas, and a data folder which has all the functions to access the database. he data folder model can be replaced with any database and this will not affect the functionality of the controllers and the tests.
Each controller has smaller independent service folders, each folder carrying similar logic to maximize reuse. Each controller folder name must end with an “ing” like “registering, listing, deleting …”. Each folder must contain at least three files.
- service.js: This contains all the functions with the logic in this folder.
- sevice.test.js: This contains the test of all the functions written in service.js.
- errors.js: This contains all the errors which are used in the service.js logic.
Find below the folder structure of the project with explanations.
Project structure
- postman: all postman files should be added here.
- role_base.postman_collection.json postman collection for integration testing.
- src all source code should be added in here.
- controllers – all core logic for endpoint control is added here.
- registering: Sub-controller handling all registration logic.
- errors.js All error used within the subcontroller. Any errors used in this sub-controller should be here.
- service.js All the logic for the sub-controller should be added here.
- service.test.js Tests for all sub-controller functions should be added here. See the documentation for jest testing here.
- registering: Sub-controller handling all registration logic.
- data all database access methods are added here.
- migrations All Sequelize migrations are added here. See the docs here.
- models All database schemas for Sequelize
- routes All routes contained in the repo.
- seeders All Sequelize seeds. Seed documentation here.
- utils Any reusable javascript code is added here.
- app.js entry point of application.
- migrate.js service to run migrations when the app is run.
- storage storage for sessions
- controllers – all core logic for endpoint control is added here.
- .env.example: Contains all the env variables used in the project. Copy and rename to .env to use locally.
- .gitlab-ci.yml: Gitlab CI/CD configuration file.
- sqlstructure.sql: The structure of the SQL exported from dbdiagrams.io
Technologies and Resources
- Node.js
- Express.js
- Jest
- Git
- PostgreSQL
- Sequelize ORM
- Postman
- GitLab CI/CD
- Docker/Docker compose
Setup
1. Download and install git from here. This should also install git bash.
2. Download and Install PgAdmin 4 from here. This comes with PostgreSQL and should automatically run after installation on port 5432(unless changed during installation). Make sure to take note of your passwords. There should be a PgAdmin password and the default user password. After installation, open git bash and run the following commands to check if Postgres is running on the same port.
psql --versionIf the version does not show up, add psql path to your system paths. On windows, this is installed by default at C:\Program Files\PostgreSQL\14\bin for version 14.
- Connect user (use the default username, which should be postgres if not changed). Enter the default user password when requested.
psql -U postgres- Check connection status
\conninfoYou should see output like this image here. This contains the informations you will need to connect to the database.

- Start PgAdmin app( Can be found on the start menu on windows)
- Create a database called
nodebasewith the user postgres.
3. Install Node.js. Download your variant from here
- After installation, open git bash and type the command below to see if you get help information.
npm -h4. Install sequelize-cli globally
npm install -g sequelize-cliAfter installation, the below command should display the help page
npx sequelize-cli --help5. Clone this repository
git clone https://github.com/scneba/nodebase.git
6. Install dependencies: open git bash on the root folder and run
npm install7. Make a copy of the .env.example and rename it to .env. Update the connection string on line 1 to include your postgres user password (update the string password below)
CONN_ST=postgres://postgres:YOUR_PASSWORD@localhost:5432/nodebase9. Run the command below to start the project with refreshing managed by nodemon. This should also run all the migrations.
npm run dev10. Install postman and create an account. Download from here.
Development
Run Seeds and Migrations with Sequelize
- cd into src/ folder and run the following command to create a sequelize config file
npx sequelize initThis should create config/config.yml file and fail to create model and migrations folders which already exist.
Update the config/config.json file to reflect the database configurations
"development": {
    "username": "postgres",
    "password": "YOURPASSWORD",
    "database": "nodebase",
    "host": "127.0.0.1",
    "dialect": "postgres"
},
Seeding
Undo all seeds
npx sequelize-cli db:seed:undo:allSeed Database
npx sequelize-cli db:seed:allTesting
Ideally, all core logic in controllers should be tested. To run tests for a particular sub controller file, use the testPathPattern eg.
npm test -- --testPathPattern "registering/"This will run all tests in the registering/ path.
Postman
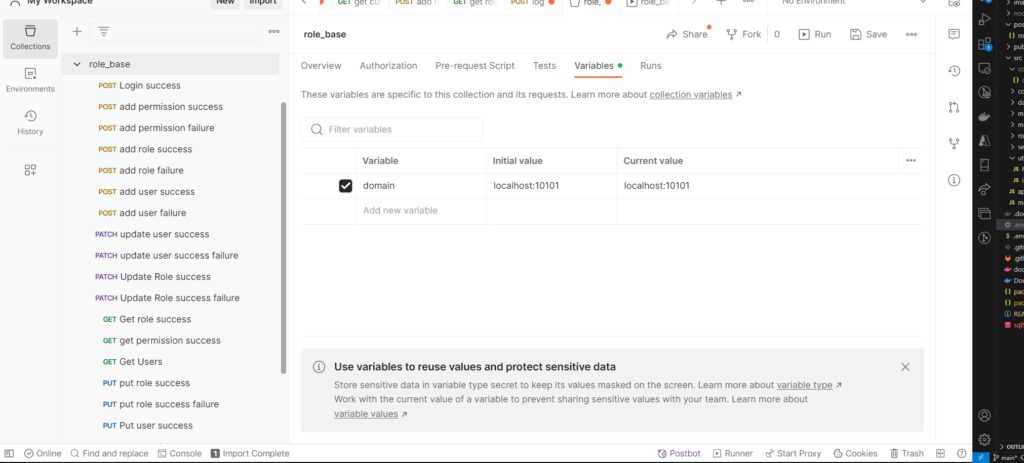
Import the collection at postman/role_base.postman_collection.json into postman. Update the domain variable in postman to localhost:{PORT}

- Run the project with nodemon from the root directory
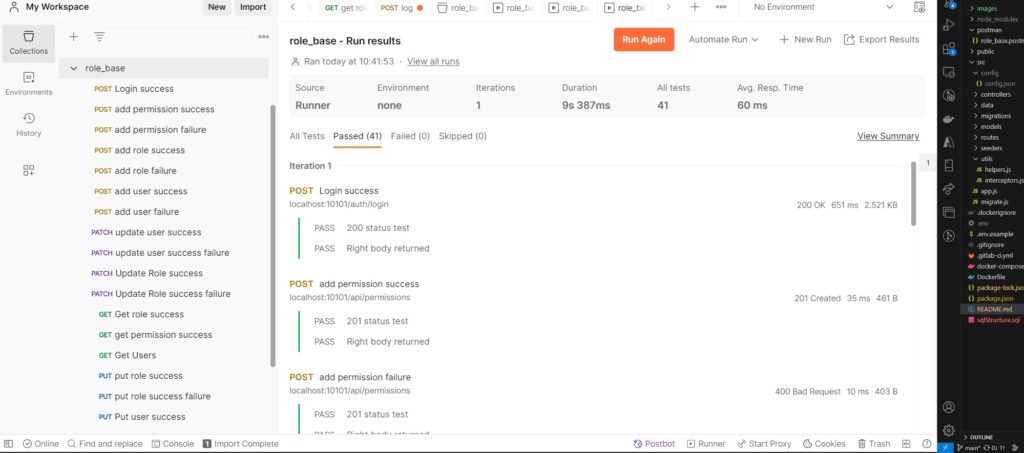
npm run dev- Run the Postman collection and make sure all the tests pass

Congratulations, you are ready to start developing with the base project.


